Share Folder Between Windows Guest and Linux Host in KVM using virtiofs
A note about virtiofs
The sharing files and folders are powered by the libvirt shared file system called virtiofs. It provides all the features and parameters to access the directory tree on the host machine. Since most of the virt-manager virtual machine configurations are translated to XML, the share files/folders can also be specified by the XML file.
Set up a mount tag in virt-manager
- First, make sure your guest virtual machine is powered off. From the virt-manager GUI, select the virtual machine and click on Open to pull up the console settings.
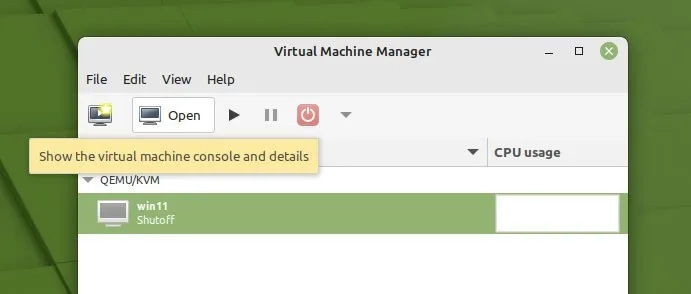
- Click on the icon which says show virtual hardware details in the toolbar. And then click on Memory on the left panel.
- Select the option “Enable shared memory“. Click Apply.
- Make sure the XML shows “access mode=shared” as below in the XML tab.
  <memoryBacking>
    <source type="memfd"/>
    <access mode="shared"/>
  </memoryBacking>
- Click “Add hardware” at the bottom.
- Select File system from the left panel in the add new hardware window.
- Then select Driver=virtiofs in the details tab. Click on browse > browse local and select the host path from your Linux system.
- In the target path, mention any name you want. It’s just a file tag which will be used during mount. This name in the target path will be mounted as Drive in Windows – My PC in Explorer.
- I have added “linux_pictures” as the target mount tag.
- So, if I want to access the Pictures folder (/home/debugpoint/Pictures), sample settings could be the following:
- Click Finish.
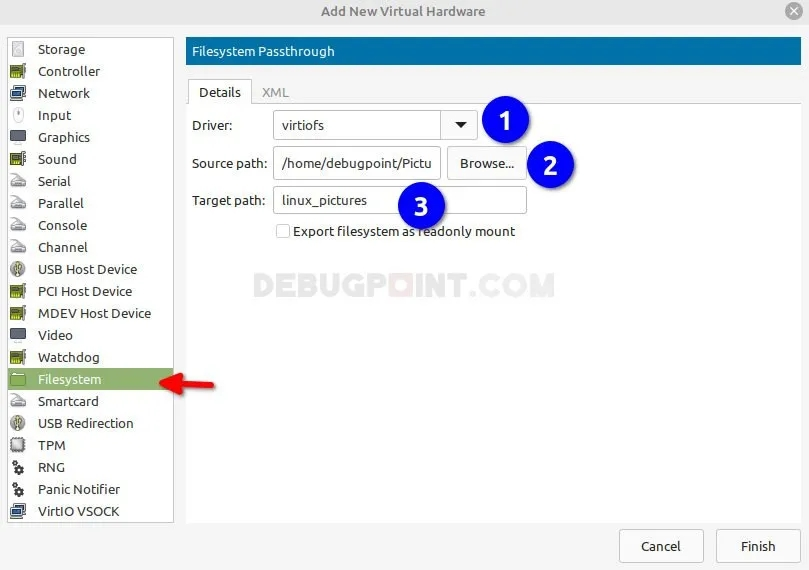
- The XML settings are below for the above configuration. You can find it in the XML tab.
<filesystem type="mount" accessmode="passthrough">
  <driver type="virtiofs"/>
  <source dir="/home/debugpoint/Pictures"/>
  <target dir="linux_pictures"/>
  <address type="pci" domain="0x0000" bus="0x05" slot="0x00" function="0x0"/>
</filesystem>
Set up WinFSP – FUSE for Windows
- First, we need to set up the WinFSP or Windows File System Proxy – FUSE for Windows. This enables you to mount any UNIX-like filesystem without any difficulties.
- Open the below page in the WinFSP GitHub from the guest Windows machine.
- Download the WinFSP .msi installer.
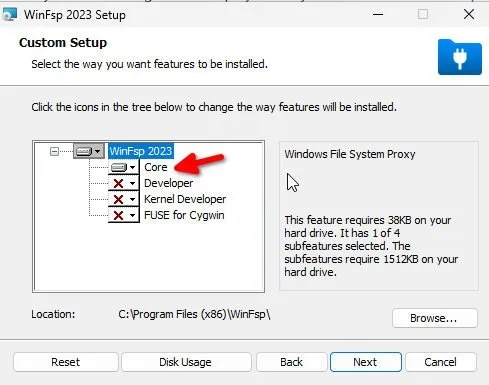
- Install the package on Windows virtual machine. Make sure to select “Core” while installing the package. Finish the installation.
Create VirtIO-FS as a service
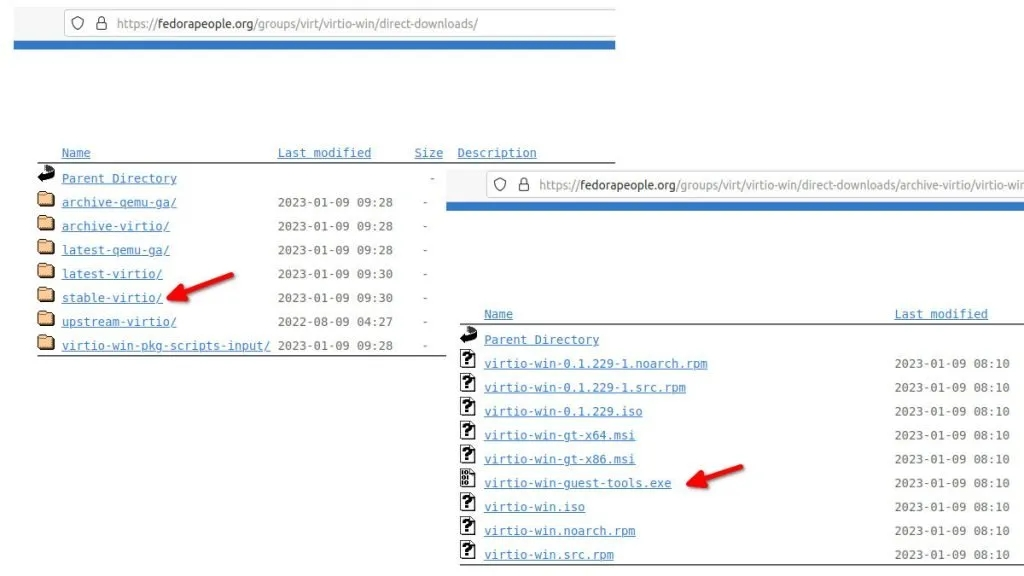
- Install the package on Windows virtual machine.
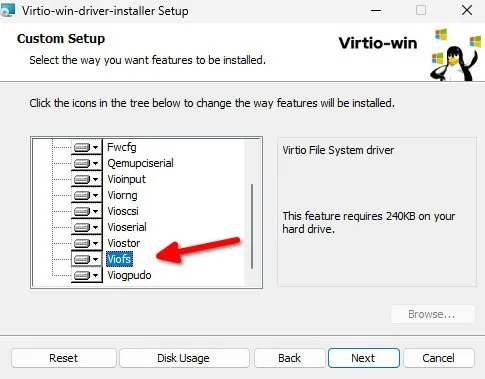
- After installation is complete, reboot Windows virtual machine.
- After reboot, open the “Device Manager” by searching in the start menu.
- Navigate to System devices and look for “VirtIO FS Device”. It should be recognized and driver should be signed by Red Hat.
- Open the start menu and search for “Services”.
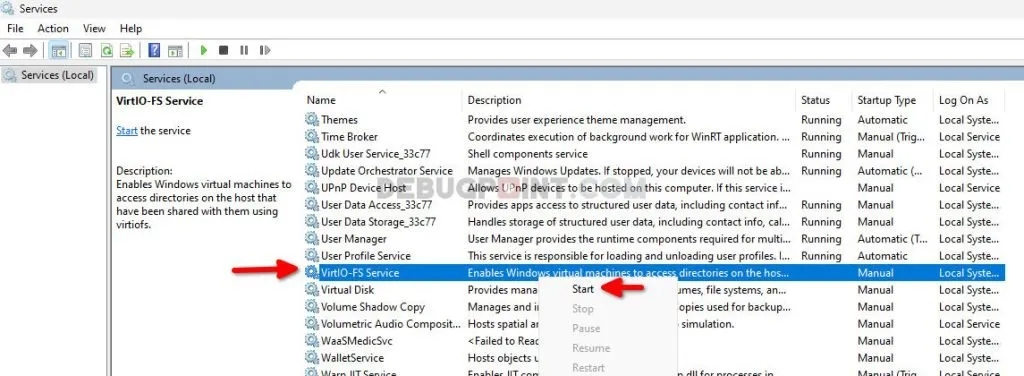
- Scroll down to find out the “VirtIO-FS Service”. Right-click and hit Start to start the service.
- (Optional) If you want to start the service each time you boot Windows guest, then set VirtIO-Sevice-FS > Properties > Startup type > Manual to Automatic
- Alternatively, you can run the below command from PowerShell/command prompt as admin to start the service.
sc create VirtioFsSvc binpath="C:\Program Files\Virtio-Win\VioFS\virtiofs.exe" start=auto depend="WinFsp.Launcher/VirtioFsDrv" DisplayName="Virtio FS Service"

sc start VirtioFsSvc
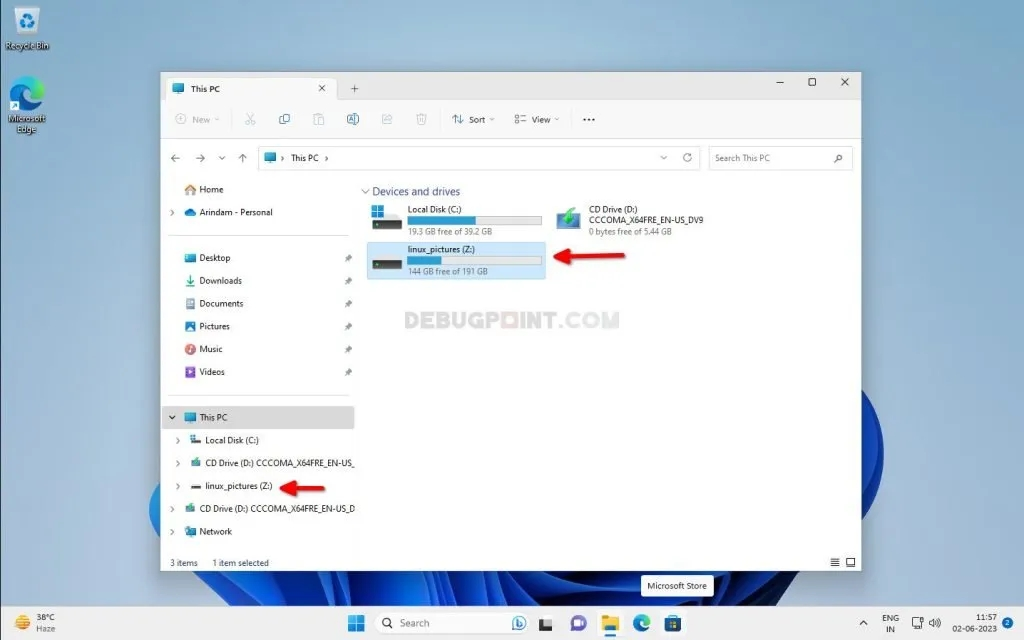
- After the service start, open Explorer, and you should see the mount tag which you have created in the first step above, which should be mapped as Z drive. See below.
- You can now access the entire Linux folder with modified permission as per your need.
© https://www.debugpoint.com/kvm-share-folder-windows-guest/